# SDXL MIGraphX Pipeline
使用 MIGraphX 后端,执行 SDXL 文生图任务。
## 论文
SDXL: Improving Latent Diffusion Models for High-Resolution Image Synthesis
+ [https://arxiv.org/abs/2307.01952](https://arxiv.org/abs/2307.01952)
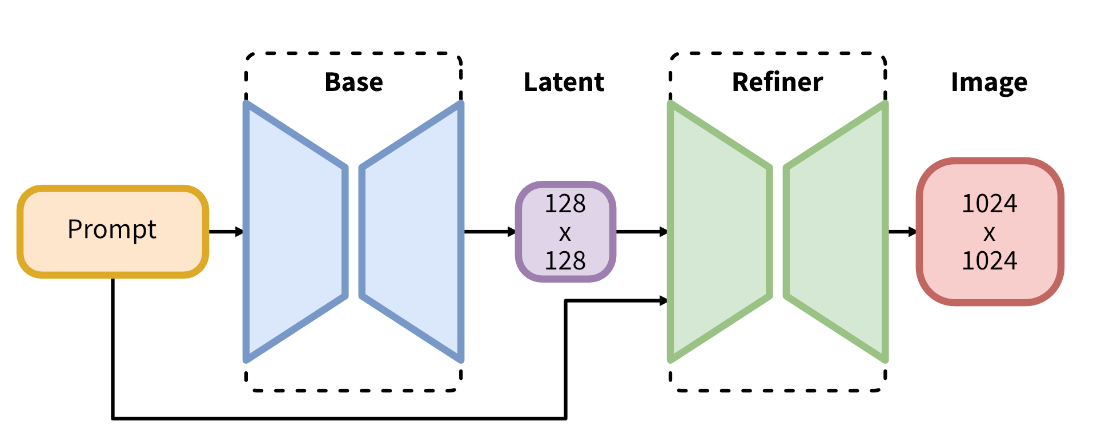
## 模型结构
SDXL 在 stable diffusion 的基础上使用了更大的 Unet backbone,以及两个 text-encoder 对 prompt 进行处理,同时包含两个模型,分别为 Base 和 Refiner,其中 Base 可以单独使用以生成图像,也可以 Base 和 Refiner同时使用,生成更高分辨率的图像。当前仅适配了 Base 模型。
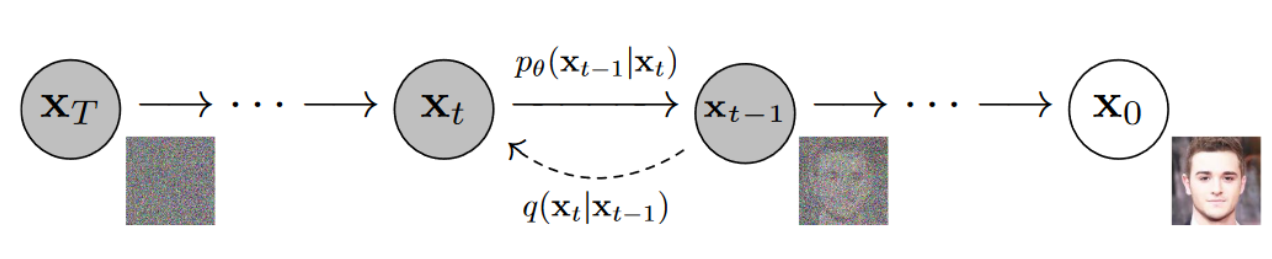
## 算法原理
SDXL 遵循 DDPM 训练目标,通过 **扩散-重建** 方式训练网络。
## 环境配置
执行以下命令:
```bash
source /opt/dtk/env.sh
export PYTHONPATH=/opt/dtk/lib:$PYTHONPATH
python -c "import migraphx"
```
若回显 `ModuleNotFoundError: No module named 'migraphx'`,则说明没有安装 MIGraphX,请移步 [DAS资源下载目录](https://das.sourcefind.cn:55011/portal/#/installation?id=f0c8268b-756c-11ef-95cc-005056904552&type=frame) 下载安装包并安装 MIGraphX。
然后安装第三方依赖:
```bash
pip install -r requirements.txt
```
> :memo: **注意:** 这里会默认安装 PyPI 官方提供的 PyTorch,在 DCU 上,需要安装经过适配的 PyTorch 版本,请前往 [DAS资源下载目录](https://das.sourcefind.cn:55011/portal/#/installation?id=04749079-6b33-11ef-b472-005056904552&type=frame) 手动下载安装 PyTorch。
接下来,安装migraphx_diffusers:
```bash
pip install dist/migraphx_diffusers-${version}-py3-none-any.whl
```
最后,设置环境变量:
```bash
source set_env.sh /path/to/your/rocblas_lib
```
## 数据集
无
## 训练
无
## 推理
### 模型准备
下载官方模型:
```
huggingface-cli download stabilityai/stable-diffusion-xl-base-1.0 --local-dir ./stable-diffusion-xl-base-1.0 --local-dir-use-symlinks False
```
官方提供的 vae 模型 fp16 推理推理场景存在精度问题,所以使用微调后的 vae 权重替换原 vae 权重:
```bash
huggingface-cli download madebyollin/sdxl-vae-fp16-fix --local-dir ./sdxl-vae-fp16-fix --local-dir-use-symlinks False
rm -r ./stable-diffusion-xl-base-1.0/vae
rm ./stable-diffusion-xl-base-1.0/vae_decoder/model.onnx
mv ./sdxl-vae-fp16-fix ./stable-diffusion-xl-base-1.0/vae
```
为 vae_decoder 重新导出 ONNX 模型:
```bash
python tools/vae_decoder_export.py --pipeline-dir ./stable-diffusion-xl-base-1.0/
```
模型优化:
```bash
bash tools/onnx_optimize.sh ./stable-diffusion-xl-base-1.0/ ./stable-diffusion-xl-base-1.0-opt/
```
### 快速开始
```python
from diffusers import DiffusionPipeline
import migraphx_diffusers
pipe = DiffusionPipeline.from_pretrained(
"./stable-diffusion-xl-base-1.0-opt/",
migraphx_config=migraphx_diffusers.DEFAULT_ARGS['sdxl']
)
pipe.to("cuda")
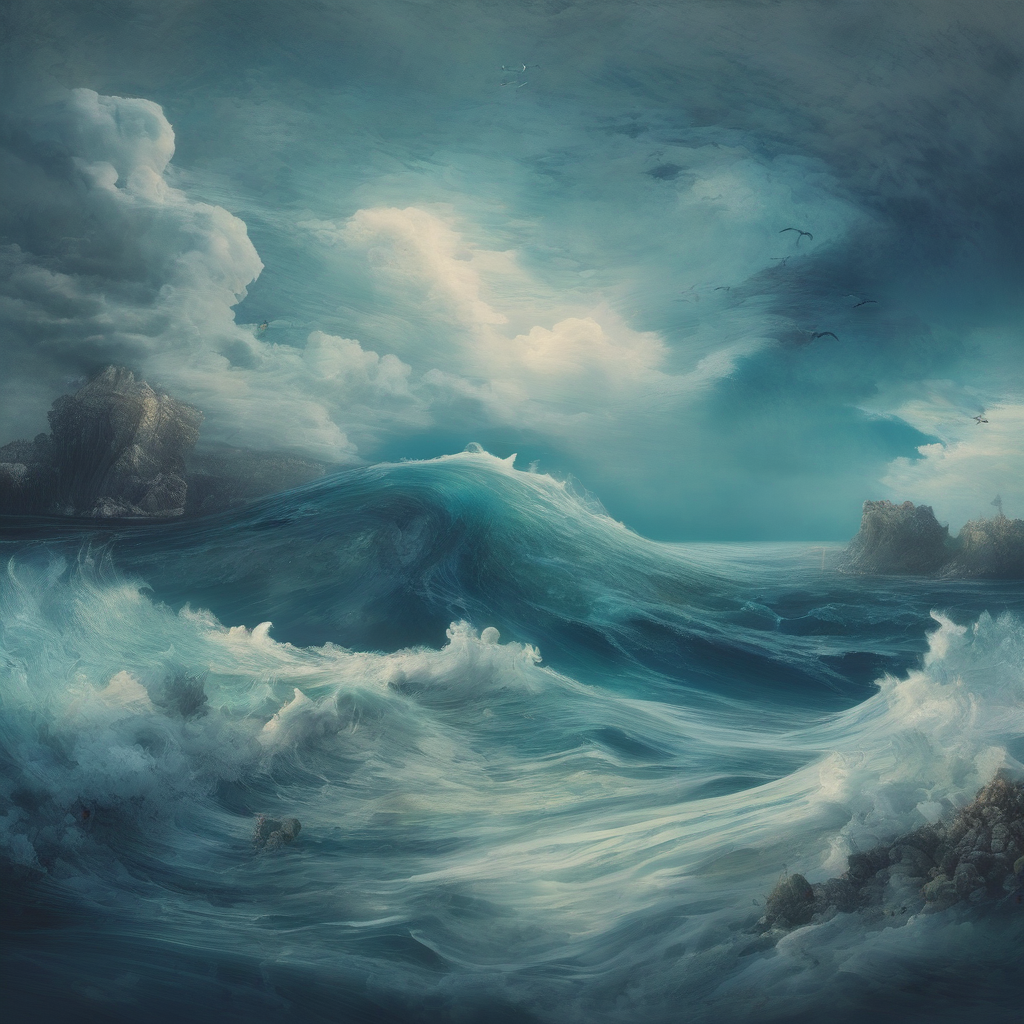
image = pipe("the ocean in dream").images[0]
image.save("sdxl_output_1024.png")
```
> :memo: **注意:** 在执行 `from_pretrained` 函数前必须执行 `import migraphx_diffusers`,使 MIGraphX 模型的加载逻辑生效。
生成结果:
也可直接使用 `tools/run_pipe.py` 脚本进行快速的推理:
```bash
python tools/run_pipe.py -m ./stable-diffusion-xl-base-1.0-opt/ -p "the ocean in dream"
```
脚本参数说明:
| 参数 | 说明 | 类型 | 默认值 |
| --- | --- | --- | --- |
| `-m` / `--model-dir` | **必选**,pipeline 模型路径 | str | None |
| `--force-compile` | 可选,是否强制重新编译模型 | bool | False |
| `--num-images-per-prompt` | 可选,一条提示词一次生成图片的数量 | int | 1 |
| `--img-size` | 可选,生成图像尺寸,如果不设置,则跟随各 pipeline 默认的图像尺寸参数 | int | None |
| `-p` / `--prompt` | **必选**,提示词,描述图片内容、风格、生成要求等 | str | None |
| `-n` / `--negative-prompt` | 可选,反向提示词,例如 "ugly" | str | None |
| `-t` / `--num-inference-steps` | 可选,生成图片时迭代多少步 | int | 50 |
| `--seed` | 可选,随机数种子 | int | 42 |
| `--save-prefix` | 可选,保存图片的前缀 | str | None |
### 参数配置
此项目使用 MIGraphX 静态 shape 推理,在加载各个子模型时,需要 `batch`、`img_size` 两个参数来固定模型的 shape;此外还需要 `model_dtype` 与 `force_compile` 两个参数,前者用来固定模型推理时采用的数据精度,后者用来控制当 .mxr 模型已经存在的情况下,是否强制重新编译。
+ `batch`: 模型输入的 batch 大小,默认为 1
+ `img_size`: 模型输入的图片尺寸,sdxl 默认为 1024,sd2.1 默认为 512
+ `model_dtype`: 模型推理时使用的数据精度,默认为 `fp16`
+ `force_compile`: 是否强制重新编译模型,默认为 `false`
加载 pipeline 时,这些参数通过 `migraphx_config` 传递给 `DiffusionPipeline.from_pretrained` 函数,在此函数内部,程序会解析出以上四个参数,并在调用各个子模型的 `from_pretrained` 函数时传入这四个参数。
各 pipeline 默认的参数配置存放于文件 [migraphx_diffusers/default_args.json](migraphx_diffusers/default_args.json) 中,可通过 `migraphx_diffusers.DEFAULT_ARGS['sdxl']` 获取 SDXL 的默认参数配置,其内容如下:
```json
{
"sdxl":{
"use_migraphx_models": [
"text_encoder",
"text_encoder_2",
"unet",
"vae_decoder"
],
"common_args": {
"batch": 1,
"img_size": 1024,
"model_dtype": "fp16",
"force_compile": false
},
"model_args": {
"text_encoder": {
"batch": 1
},
"text_encoder_2": {
"batch": 1
}
}
}
}
```
其中:
+ `use_migraphx_models`: 指定在推理时,哪些子模型使用 MIGraphX 后端进行推理,此列表以外的子模型,使用 PyTorch 进行推理。
+ `common_args`: MIGraphX 加载各子模型的通用参数;
+ `model_args`: 若某个子模型不想按照通用参数加载模型,可在此字段中单独进行配置,例如:
```json
"model_args": {
"vae_decoder":{
"model_dtype": "fp32",
"force_compile": true
}
}
```
> :memo: **注意:** pipeline 的 batch 含义为 **1** 条 prompt 生成 batch 张图片。 prompt 数量决定文本编码器的 batch,也就是说,不管 pipeline 是单 batch 推理还是多 batch 推理,文本编码器的 batch 均为 1,所以在默认配置文件中,将 `text_encoder` 与 `text_encoder_2` 的 batch 都固定为 1。
### 模型加载与缓存
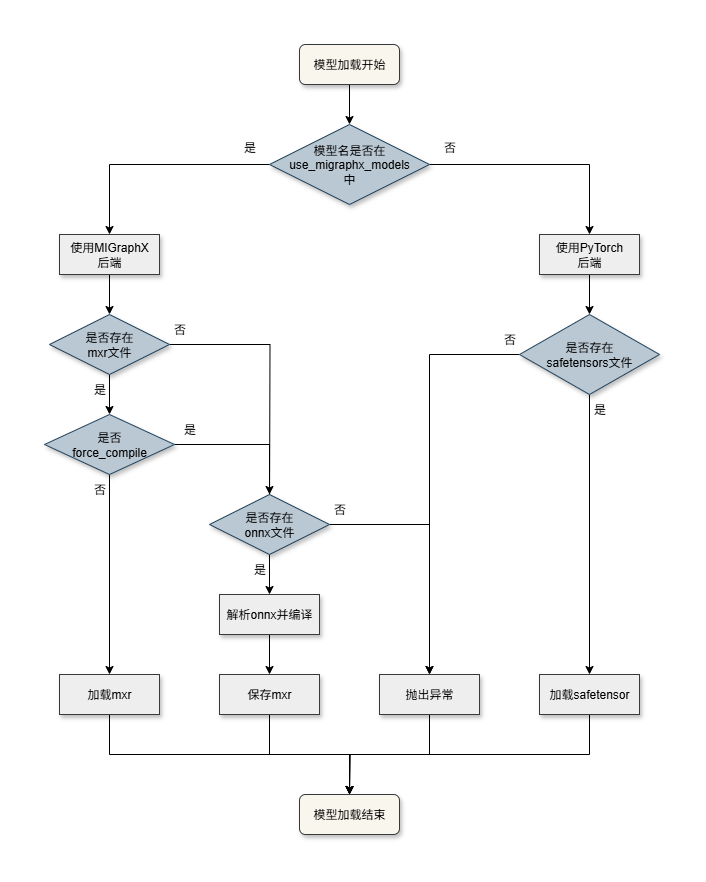
各子模型加载流程如下:
 加载与缓存逻辑:
+ 若模型名在 `use_migraphx_models` 列表中,则使用 MIGraphX 后端:
+ 若存在 .mxr 缓存且 `force_compile` 为 false,则直接从 .mxr 缓存文件中加载模型;
+ 否则判断是否存在 .onnx 文件,若存在则解析 .onnx 文件并编译,且对编译后的模型保存为 .mxr 文件,不存在则抛出异常。
+ 否则使用 PyTorch 后端:
+ 若存在 .safetensors 文件,则从中加载权重,否则抛出异常。
### 目录结构与命名规则
整体的目录结构遵循 [huggingface](https://huggingface.co/stabilityai/stable-diffusion-xl-base-1.0/tree/main) 的格式,以 sdxl 为例,其目录结构如下:
```
├── ./stable-diffusion-xl-base-1.0-opt/
├── model_index.json
├── scheduler/
│ └── scheduler_config.json
├── text_encoder/
│ ├── config.json
│ └── model.onnx
├── text_encoder_2/
│ ├── config.json
│ ├── model.onnx
│ └── model.onnx_data
├── tokenizer/
│ ├── merges.txt
│ ├── special_tokens_map.json
│ ├── tokenizer_config.json
│ └── vocab.json
├── tokenizer_2/
│ ├── merges.txt
│ ├── special_tokens_map.json
│ ├── tokenizer_config.json
│ └── vocab.json
├── unet/
│ ├── config.json
│ ├── model.onnx
│ └── model.onnx.data
└── vae_decoder/
├── config.json
└── model.onnx
```
每个子模型的 ONNX 文件均需命名为 model.onnx,若模型较大,可以只将模型结构存放于 model.onnx 内,而将权重数据外存为 model.onnx.data 文件。
若想使用编译好的 mxr 文件,则需要将 mxr 文件重命名为 `model_{model_dtype}_b{batch}_{img_size}_gpu.mxr`,然后将其放置于对应的子模型目录下。最后加载模型时,还应且将 `force_compile` 设置为 False。
如果某个子模型想使用 PyTorch 推理,则需要在 `use_migraphx_models` 列表中移除该子模型的名称,并在对应的子目录下放置 safetensors 文件,名称与 [huggingface](https://huggingface.co/stabilityai/stable-diffusion-xl-base-1.0/tree/main) 保持一致即可。
### 多 batch 推理
当前仅支持一个提示词同时生成一张图片,即 batch=1 推理,多 batch 推理功能适配中。
### 不同的图像尺寸
在默认配置中,sdxl生成图像尺寸为 1024x1024, 如果想要生成其他尺寸的图像,只需修改 `img_size` 字段即可。
示例:
```python
from diffusers import DiffusionPipeline
import migraphx_diffusers
migraphx_config = migraphx_diffusers.DEFAULT_ARGS['sdxl']
migraphx_config['common_args']['img_size'] = 512 # 修改图像尺寸
pipe = DiffusionPipeline.from_pretrained(
"./stable-diffusion-xl-base-1.0-opt/",
migraphx_config=migraphx_config
)
pipe.to("cuda")
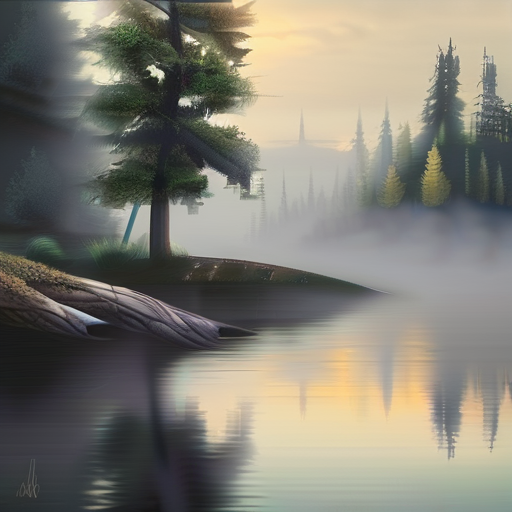
image = pipe("Misty morning lake").images[0]
image.save("sdxl_output_512.png")
```
生成结果:
加载与缓存逻辑:
+ 若模型名在 `use_migraphx_models` 列表中,则使用 MIGraphX 后端:
+ 若存在 .mxr 缓存且 `force_compile` 为 false,则直接从 .mxr 缓存文件中加载模型;
+ 否则判断是否存在 .onnx 文件,若存在则解析 .onnx 文件并编译,且对编译后的模型保存为 .mxr 文件,不存在则抛出异常。
+ 否则使用 PyTorch 后端:
+ 若存在 .safetensors 文件,则从中加载权重,否则抛出异常。
### 目录结构与命名规则
整体的目录结构遵循 [huggingface](https://huggingface.co/stabilityai/stable-diffusion-xl-base-1.0/tree/main) 的格式,以 sdxl 为例,其目录结构如下:
```
├── ./stable-diffusion-xl-base-1.0-opt/
├── model_index.json
├── scheduler/
│ └── scheduler_config.json
├── text_encoder/
│ ├── config.json
│ └── model.onnx
├── text_encoder_2/
│ ├── config.json
│ ├── model.onnx
│ └── model.onnx_data
├── tokenizer/
│ ├── merges.txt
│ ├── special_tokens_map.json
│ ├── tokenizer_config.json
│ └── vocab.json
├── tokenizer_2/
│ ├── merges.txt
│ ├── special_tokens_map.json
│ ├── tokenizer_config.json
│ └── vocab.json
├── unet/
│ ├── config.json
│ ├── model.onnx
│ └── model.onnx.data
└── vae_decoder/
├── config.json
└── model.onnx
```
每个子模型的 ONNX 文件均需命名为 model.onnx,若模型较大,可以只将模型结构存放于 model.onnx 内,而将权重数据外存为 model.onnx.data 文件。
若想使用编译好的 mxr 文件,则需要将 mxr 文件重命名为 `model_{model_dtype}_b{batch}_{img_size}_gpu.mxr`,然后将其放置于对应的子模型目录下。最后加载模型时,还应且将 `force_compile` 设置为 False。
如果某个子模型想使用 PyTorch 推理,则需要在 `use_migraphx_models` 列表中移除该子模型的名称,并在对应的子目录下放置 safetensors 文件,名称与 [huggingface](https://huggingface.co/stabilityai/stable-diffusion-xl-base-1.0/tree/main) 保持一致即可。
### 多 batch 推理
当前仅支持一个提示词同时生成一张图片,即 batch=1 推理,多 batch 推理功能适配中。
### 不同的图像尺寸
在默认配置中,sdxl生成图像尺寸为 1024x1024, 如果想要生成其他尺寸的图像,只需修改 `img_size` 字段即可。
示例:
```python
from diffusers import DiffusionPipeline
import migraphx_diffusers
migraphx_config = migraphx_diffusers.DEFAULT_ARGS['sdxl']
migraphx_config['common_args']['img_size'] = 512 # 修改图像尺寸
pipe = DiffusionPipeline.from_pretrained(
"./stable-diffusion-xl-base-1.0-opt/",
migraphx_config=migraphx_config
)
pipe.to("cuda")
image = pipe("Misty morning lake").images[0]
image.save("sdxl_output_512.png")
```
生成结果:
 > :bulb: **提示:** 经测试,sdxl 生成 1024x1024 大小的图片效果最佳,推荐使用此尺寸。
### Tools
1. [以通用方式加载并运行pipeline](tools/README.md#以通用方式加载并运行pipeline)
2. [以自定义组件方式加载并运行pipeline](tools/README.md#以自定义组件方式加载并运行pipeline)
3. [批量生成图片](tools/README.md#批量生成图片)
4. [统计各模块耗时](tools/README.md#统计各模块耗时)
### Result
SDXL 生成样例:
> :bulb: **提示:** 经测试,sdxl 生成 1024x1024 大小的图片效果最佳,推荐使用此尺寸。
### Tools
1. [以通用方式加载并运行pipeline](tools/README.md#以通用方式加载并运行pipeline)
2. [以自定义组件方式加载并运行pipeline](tools/README.md#以自定义组件方式加载并运行pipeline)
3. [批量生成图片](tools/README.md#批量生成图片)
4. [统计各模块耗时](tools/README.md#统计各模块耗时)
### Result
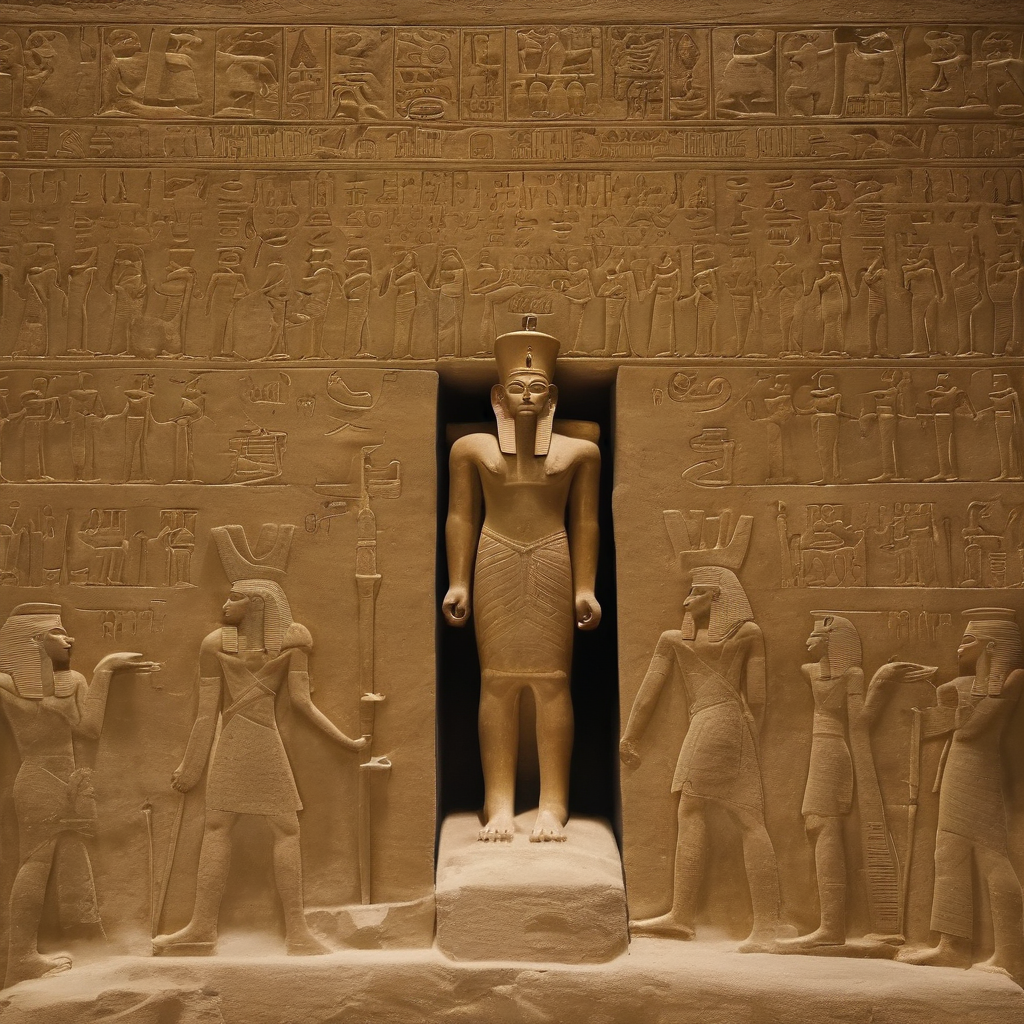
SDXL 生成样例:
| 自然风景 |
人物肖像 |
 |
 |
| 科幻与奇幻 |
生物 |
 |
 |
| 建筑与空间 |
抽象与艺术 |
 |
 |
| 日常生活 |
历史与复古 |
 |
 |
| 暗黑与怪诞 |
科技与数码 |
 |
 |
更多生成示例: [examples](examples)
### 精度
无
## 应用场景
### 算法类别
`以文生图`
### 热点应用行业
`绘画`,`动漫`,`媒体`
## 源码仓库及问题反馈
https://developer.sourcefind.cn/codes/modelzoo/sdxl-migraphx
## 参考资料
1. [https://github.com/ROCm/AMDMIGraphX/tree/develop/examples/diffusion/python_stable_diffusion_xl](https://github.com/ROCm/AMDMIGraphX/tree/develop/examples/diffusion/python_stable_diffusion_xl)
2. [stable-diffusion-xl_pytorch](https://sourcefind.cn/#/model-zoo/1823278587022897153)
3. [https://huggingface.co/docs/diffusers/using-diffusers/custom_pipeline_overview](https://huggingface.co/docs/diffusers/using-diffusers/custom_pipeline_overview)
4. [https://huggingface.co/stabilityai/stable-diffusion-xl-base-1.0](https://huggingface.co/stabilityai/stable-diffusion-xl-base-1.0)