# GLM4.5
## 论文
`
GLM-4.5: Reasoning, Coding, and Agentic Abililties
`
- https://z.ai/blog/glm-4.5
## 模型结构
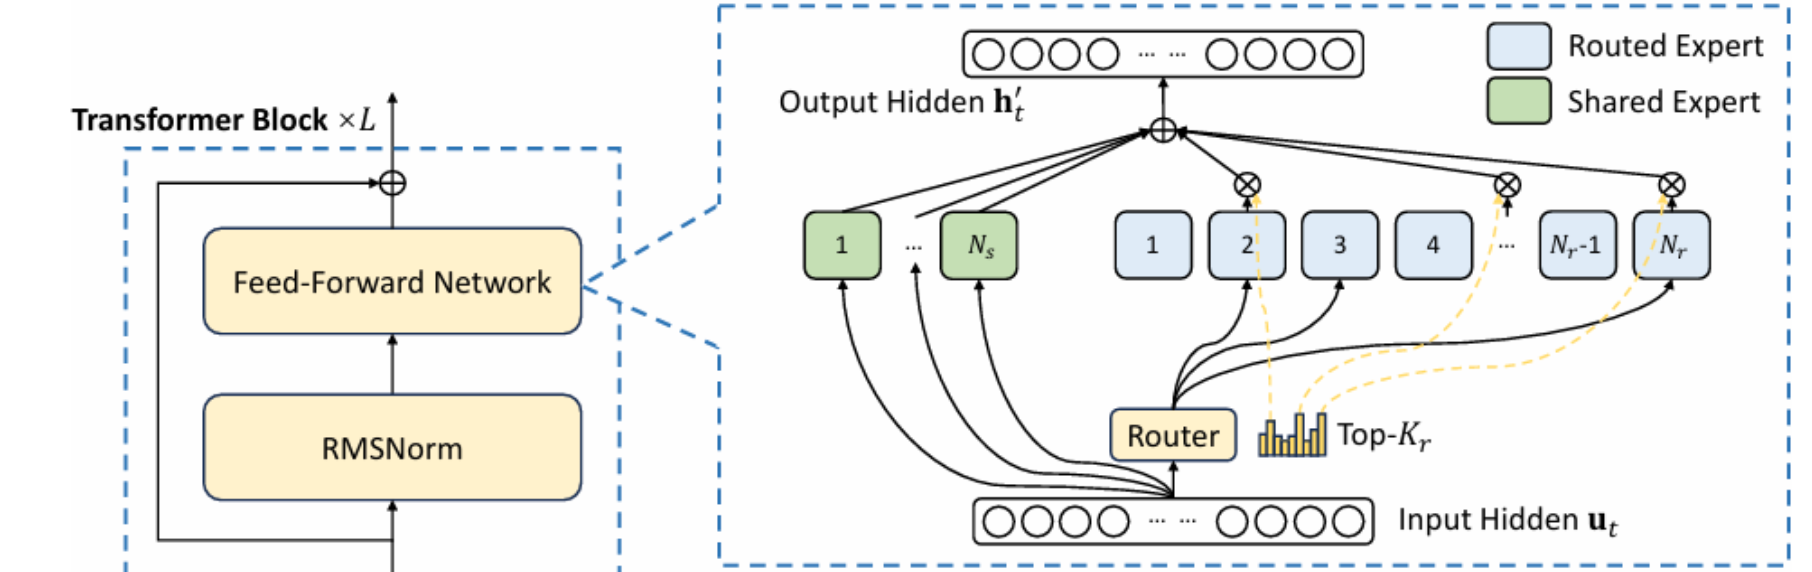
在 GLM-4.5 系列模型中,我们采用了 MoE(专家混合)架构,这种架构能够显著提升训练和推理时的计算效率。我们在 MoE 层采用了 loss-free balance 路由和 sigmoid gate 机制。
## 算法原理
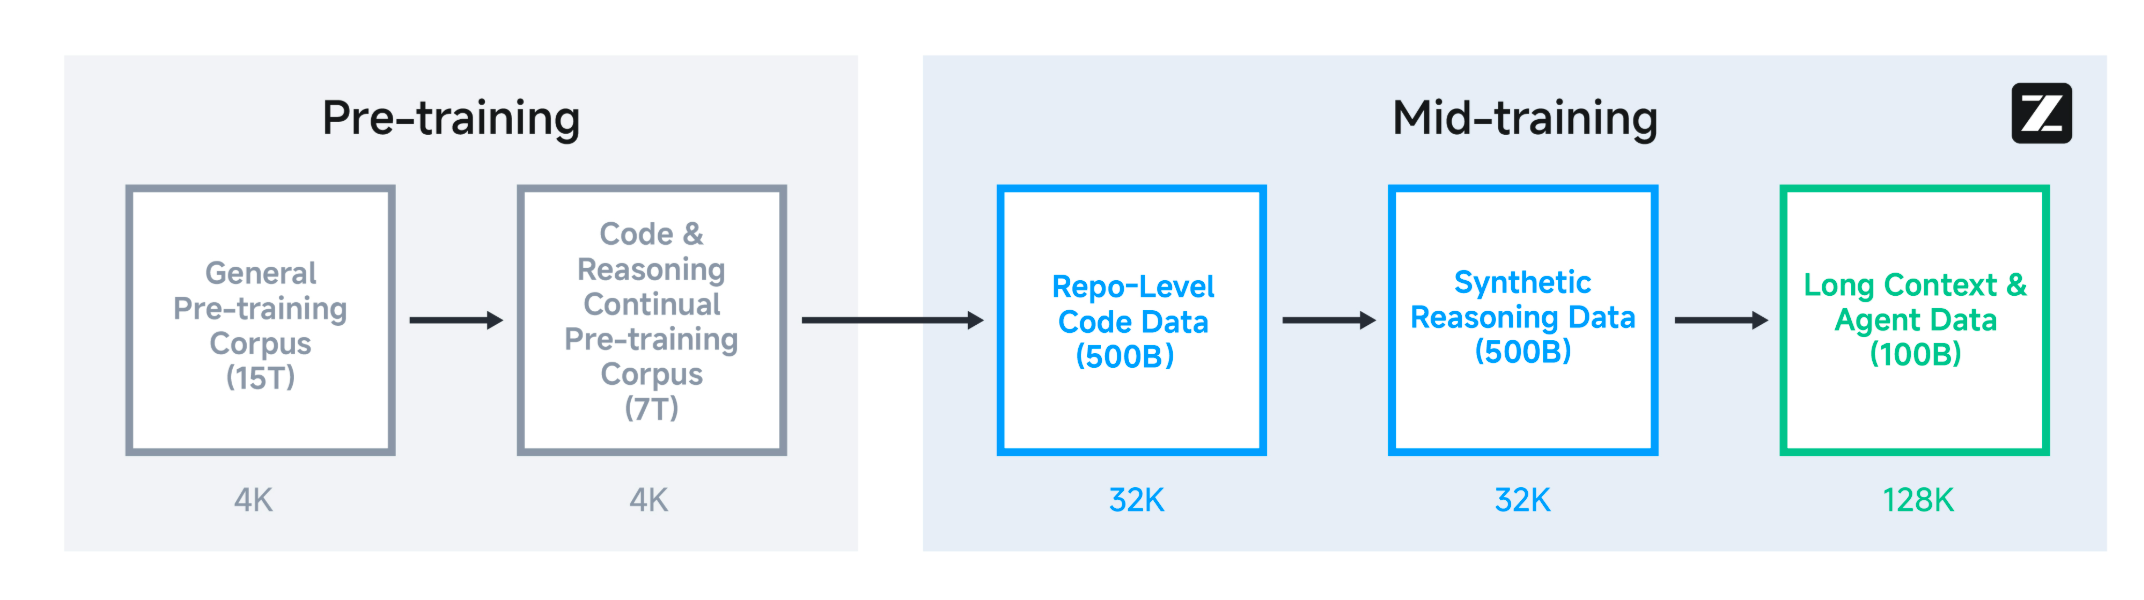
我们的基础模型经历了几个训练阶段。在预训练期间,模型首先在 15T token 的通用预训练语料库上训练,然后在 7T token 的代码和推理语料库上训练。预训练后,我们引入了 Mid-Training 阶段来进一步提升模型在专有领域上的性能。
## 环境配置
### 硬件需求
DCU型号:BW1000,节点数量:2 台,卡数:2*8 张。
### 通信配置
一、节点间基础通信
`在本地机器上配置以下内容:`
1、关闭防火墙:
```
systemctl stop firewalld # 若为centos
ufw disable # 若为Ubuntu
```
2、设置amd_iommu=on:
```
vim /etc/default/grub
```
更新下配置:
```
grub2-mkconfig -o /boot/efi/EFI/rocky/grub.cfg
```
重启机器后校验是否生效(检查是否存在imxxx=pt):
```
BOOT_IMAGE=(hd0,gpt3)/vmlinuz-4.18.0-372.9.1.el8.x86_64 root=UUID=80974f58-7d23-49bb-bd8b-8e299eb0d188 ro crashkernel=auto rhgb quiet systemd.unified_cgroup_hierachy=1 systemd.unified_cgroup_hierarchy=1 amd_iommu=on iommu=pt
```
`在后面步骤启动的容器里面配置以下内容:`
```
apt update
apt install openssh-server -y
```
vim /etc/ssh/sshd_config # 修改下面PermitRootLogin为yes
```
# 取消以下4句命令的注释
RSAAuthentication yes #启用 RSA 认证
PubkeyAuthentication yes #启用公钥私钥配对认证方式
AuthorizedKeysFile ~/.ssh/authorized_keys #公钥文件路径(和下面生成的文件同)
PermitRootLogin yes #root能使用ssh登录
```
重启ssh服务,并设置开机启动:
```
service sshd restart
chkconfig sshd on
查看sshd状态:service ssh status
开启sshd服务:/etc/init.d/ssh restart
```
下面开始设置节点间免密通信的秘钥:
1、ssh-keygen生成秘钥
```
ssh-keygen -t ed25519 # 此处以ed25519为例,读者可自己设置为其它名字,遇到提问全部回车键确认
```
2、将需要使用的各个节点`~/.ssh/authorized_keys`里的秘钥收集复制到`~/.ssh/id_rsa.pub`,每个节点`~/.ssh/id_rsa.pub`里的所有秘钥最终一致。格式类似如下:
3、设置节点间的通信端口号
```
/usr/sbin/sshd -p 10085 # 不同节点可以设置不同的端口号,打通秘钥和端口号之后可以用ssh -p之类的命令验证节点间是否通信已经通畅,否则需检查前面步骤是否设置成功。
```
以上设置非标准步骤,不同服务器或集群存在明显差异,无法完全复制此过程,请读者根据自己机器的实际情况灵活采用,总体目标是开启amd_iommu、打通节点间的容器内可以直接免密登录。
二、ray相关通信
`在后面步骤启动的容器里面配置以下内容:`
```
vim ~/.bashrc
```
在脚本`.bashrc`最后面添加以下命令(以BW千卡集群为例):
```
export ALLREDUCE_STREAM_WITH_COMPUTE=1
export VLLM_HOST_IP=x.x.x.x
export NCCL_SOCKET_IFNAME=ib0
export GLOO_SOCKET_IFNAME=ib0
unset NCCL_ALGO
export NCCL_MIN_NCHANNELS=16
export NCCL_MAX_NCHANNELS=16
export NCCL_NET_GDR_READ=1
export HIP_VISIBLE_DEVICES=0,1,2,3,4,5,6,7
export LMSLIM_USE_LIGHTOP=0
#针对hycpu环境建议设置绑核操作:
export VLLM_NUMA_BIND=1
export VLLM_RANK0_NUMA=0
export VLLM_RANK1_NUMA=1
export VLLM_RANK2_NUMA=2
export VLLM_RANK3_NUMA=3
export VLLM_RANK4_NUMA=4
export VLLM_RANK5_NUMA=5
export VLLM_RANK6_NUMA=6
export VLLM_RANK7_NUMA=7
#BW集群需要额外设置的环境变量:
export NCCL_NET_GDR_LEVEL=7
export NCCL_SDMA_COPY_ENABLE=0
export NCCL_IB_HCA=mlx5_2:1,mlx5_3:1,mlx5_4:1,mlx5_5:1,mlx5_6:1,mlx5_7:1,mlx5_8:1,mlx5_9:1
export NCCL_TOPO_FILE="topo-input.xml"
# 若为K100_AI卡,则添加以下信息(本步骤以BW卡为示例,故注释了以下信息。):
# export VLLM_ENFORCE_EAGER_BS_THRESHOLD=44
```
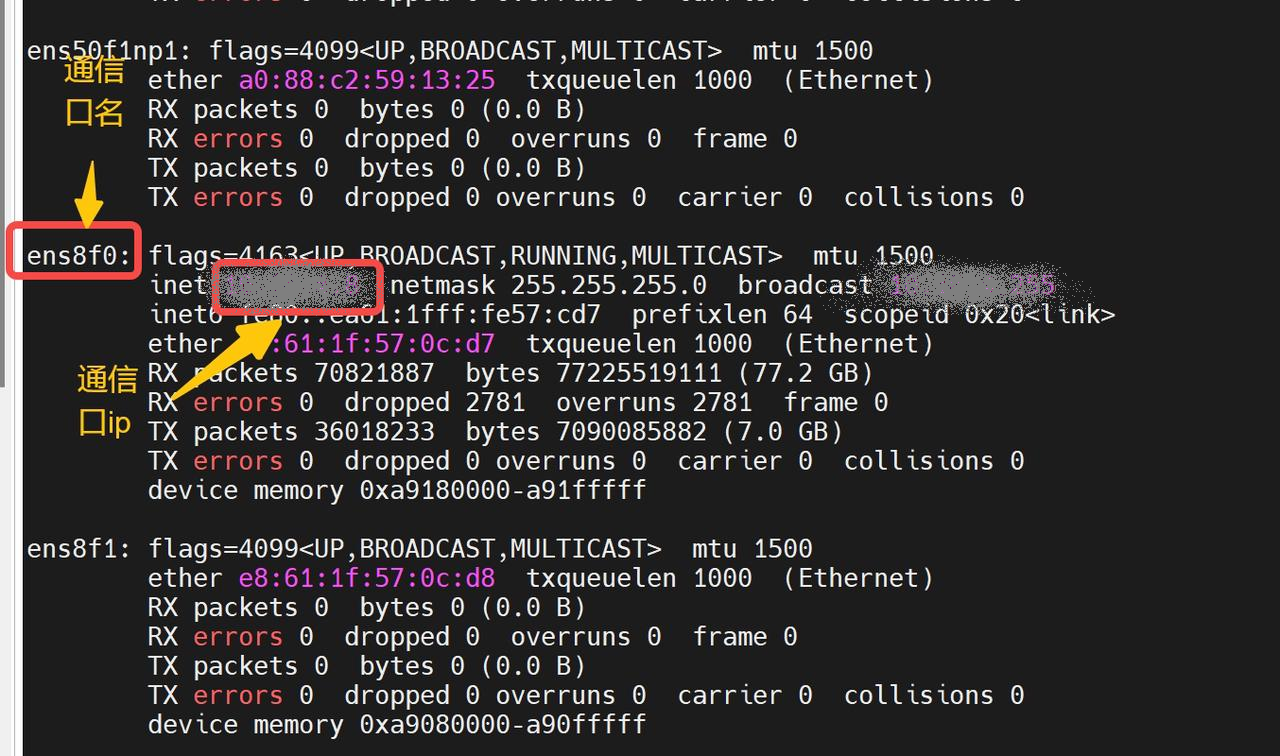
其中`VLLM_HOST_IP`和`NCCL_SOCKET_IFNAME`需要替换成每个自己机器上查到的信息,每个节点的ip不同,查询方式如下:
```
通信口和ip查询方法:ifconfig
VLLM_HOST_IP: 节点本地通信口ip
NCCL_SOCKET_IFNAME和GLOO_SOCKET_IFNAME: 节点本地通信网口名
```
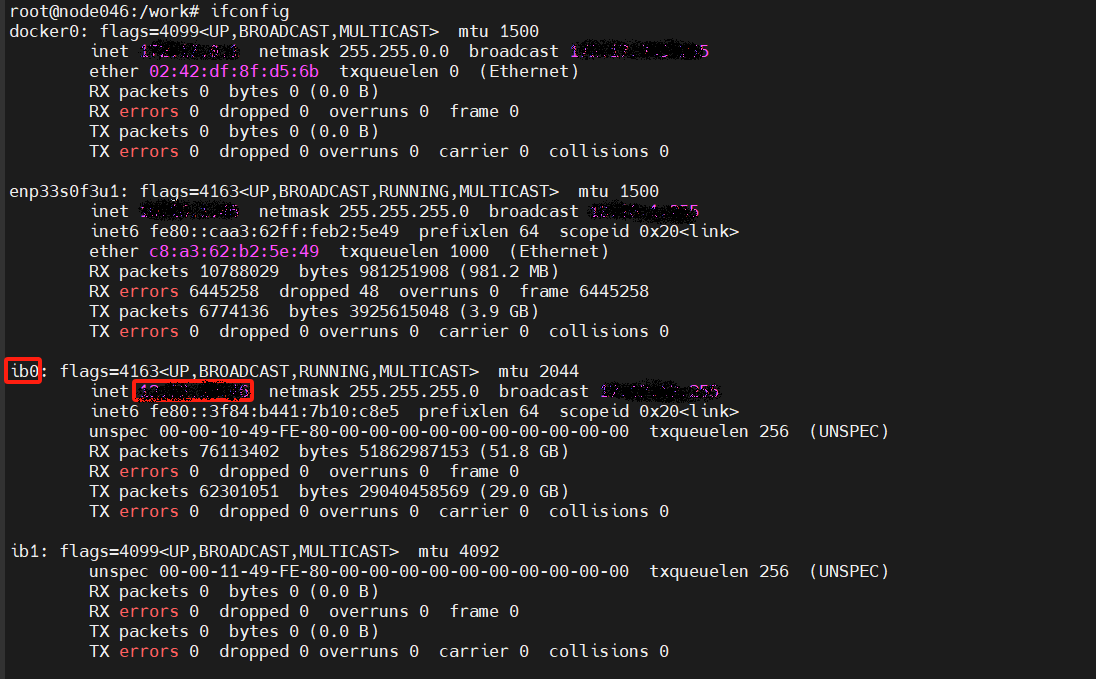
`示例:`
带BW卡的集群VLLM_HOST_IP需要设置为ib网卡对应的IP,避免出现rccl超时问题:
注意:添加完以上信息后需要激活环境变量
```
source ~/.bashrc
```
`Tips:由于通信配置方面属于运维人员的专业内容,以上关于通信的配置建议读者联系运维人员进行配置。`
### Docker(方法一)
```
docker pull image.sourcefind.cn:5000/dcu/admin/base/vllm:0.9.2-ubuntu22.04-dtk25.04.1-rc5-rocblas101839-0811-das1.6-py3.10-20250812-beta
docker run -it --name glm4.5_vllm --shm-size=1024G --device=/dev/kfd --device=/dev/dri/ --privileged --cap-add=SYS_PTRACE --security-opt seccomp=unconfined --ulimit memlock=-1:-1 --ipc=host --network host --group-add video -v /opt/hyhal:/opt/hyhal:ro -v $PWD/Step3_pytorch:/home/Step3_pytorch f0e4191089de /bin/bash
wget --content-disposition 'https://download.sourcefind.cn:65024/file/4/triton/DAS1.6/triton-3.0.0+das.opt1.dtk25041-cp310-cp310-manylinux_2_28_x86_64.whl'
pip install triton-3.0.0+das.opt1.dtk25041-cp310-cp310-manylinux_2_28_x86_64.whl
```
### Dockerfile(方法二)
```
cd $PWD/glm4.5_pytorch/docker
docker build --no-cache -t glm4.5:latest .
docker run -it --name glm4.5_vllm --shm-size=1024G --device=/dev/kfd --device=/dev/dri/ --privileged --cap-add=SYS_PTRACE --security-opt seccomp=unconfined --ulimit memlock=-1:-1 --ipc=host --network host --group-add video -v /opt/hyhal:/opt/hyhal:ro -v $PWD/Step3_pytorch:/home/glm4.5_pytorch {imageID}/bin/bash
wget --content-disposition 'https://download.sourcefind.cn:65024/file/4/triton/DAS1.6/triton-3.0.0+das.opt1.dtk25041-cp310-cp310-manylinux_2_28_x86_64.whl'
pip install triton-3.0.0+das.opt1.dtk25041-cp310-cp310-manylinux_2_28_x86_64.whl
```
## 数据集
`无`
## 训练
`无`
## 推理
预训练权重目录结构,将后续模型地址切换成实际模型权重地址:
```
/home/glm4.5_pytorch/
└── zai-org/GLM-4.5
```
### 多机多卡
启动ray集群
```
# 启动ray
# 启动主节点的ray, x.x.x.x 为前面步骤中ifconfig查到的主节点ip(VLLM_HOST_IP),--port为端口号,可以随意设置,保持主节点和其余节点端口号一致。
ray start --head --node-ip-address=x.x.x.x --port=6379 --num-gpus=8 --num-cpus=32
# 启动其它节点的ray,注意 x.x.x.x 为前面步骤中ifconfig查到的主节点ip(VLLM_HOST_IP)。
ray start --address='x.x.x.x:6379' --num-gpus=8 --num-cpus=32
# 可用ray status 查看ray的集群启动状态。
```
vLLM Deployment(vllm官方暂不支持AFD,只支持非分离模式部署):
```
#head节点执行
VLLM_USE_NN=0 VLLM_USE_FLASH_ATTN_PA=0 vllm serve /path/to/GLM4.5 \
--reasoning-parser glm4_moe \
--enable-auto-tool-choice \
--tool-call-parser glm4_moe \
--trust-remote-code \
--max-num-batched-tokens 4096 \
--distributed-executor-backend ray \
--dtype float16 \
-tp 16 \
--port $PORT_SERVING
```
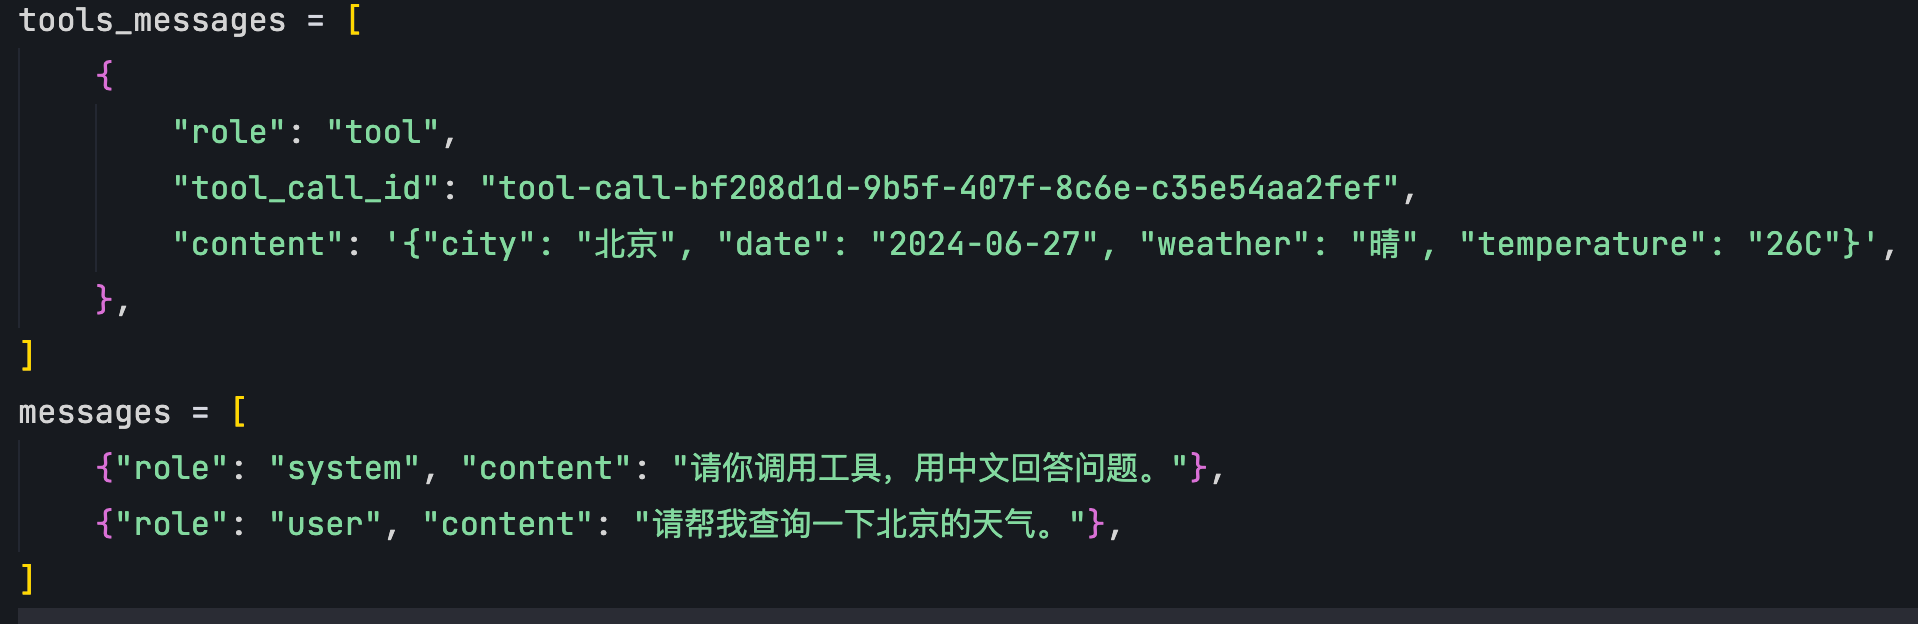
- 客户端请求
```bash
python inference/api_request.py
```
更多资料可参考源项目中的[`README_zh`](./README_zh.md)。
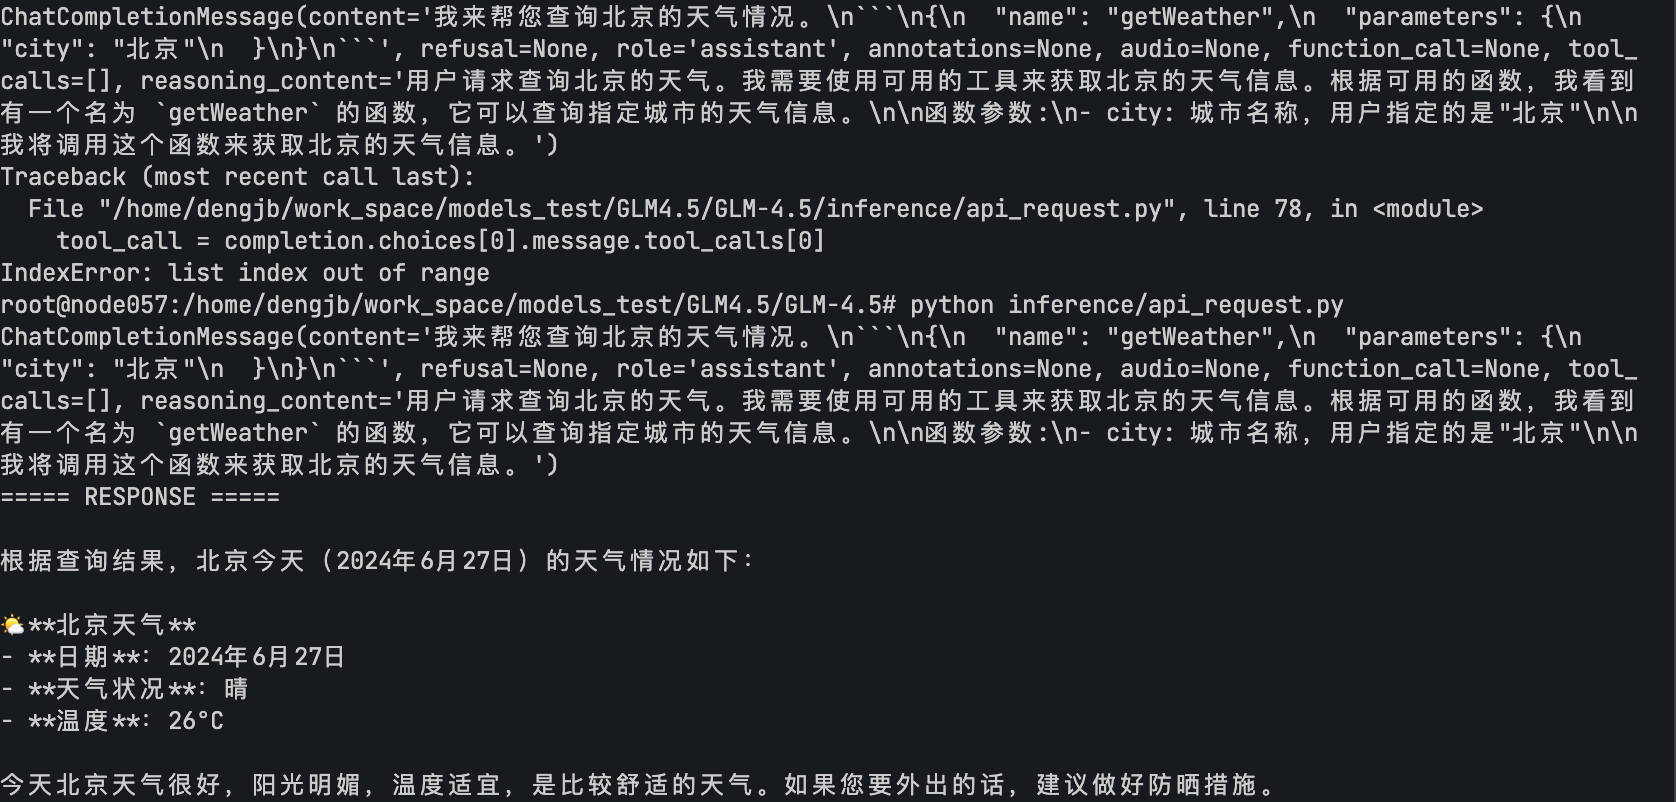
## result
example1:
- text: 请帮我查询一下北京的天气。
- 输出结果:
### 精度
DCU与GPU精度一致,推理框架:vllm。
## 应用场景
### 算法类别
`对话问答`
### 热点应用行业
`电商,教育,广媒`
## 预训练权重
huggingface权重下载地址为:
- [zai-org/GLM-4.5](https://huggingface.co/zai-org/GLM-4.5)
`注:建议加镜像源下载:export HF_ENDPOINT=https://hf-mirror.com`
## 源码仓库及问题反馈
- https://developer.sourcefind.cn/codes/modelzoo/glm4.5_pytorch
## 参考资料
- https://github.com/zai-org/GLM-4.5/tree/main